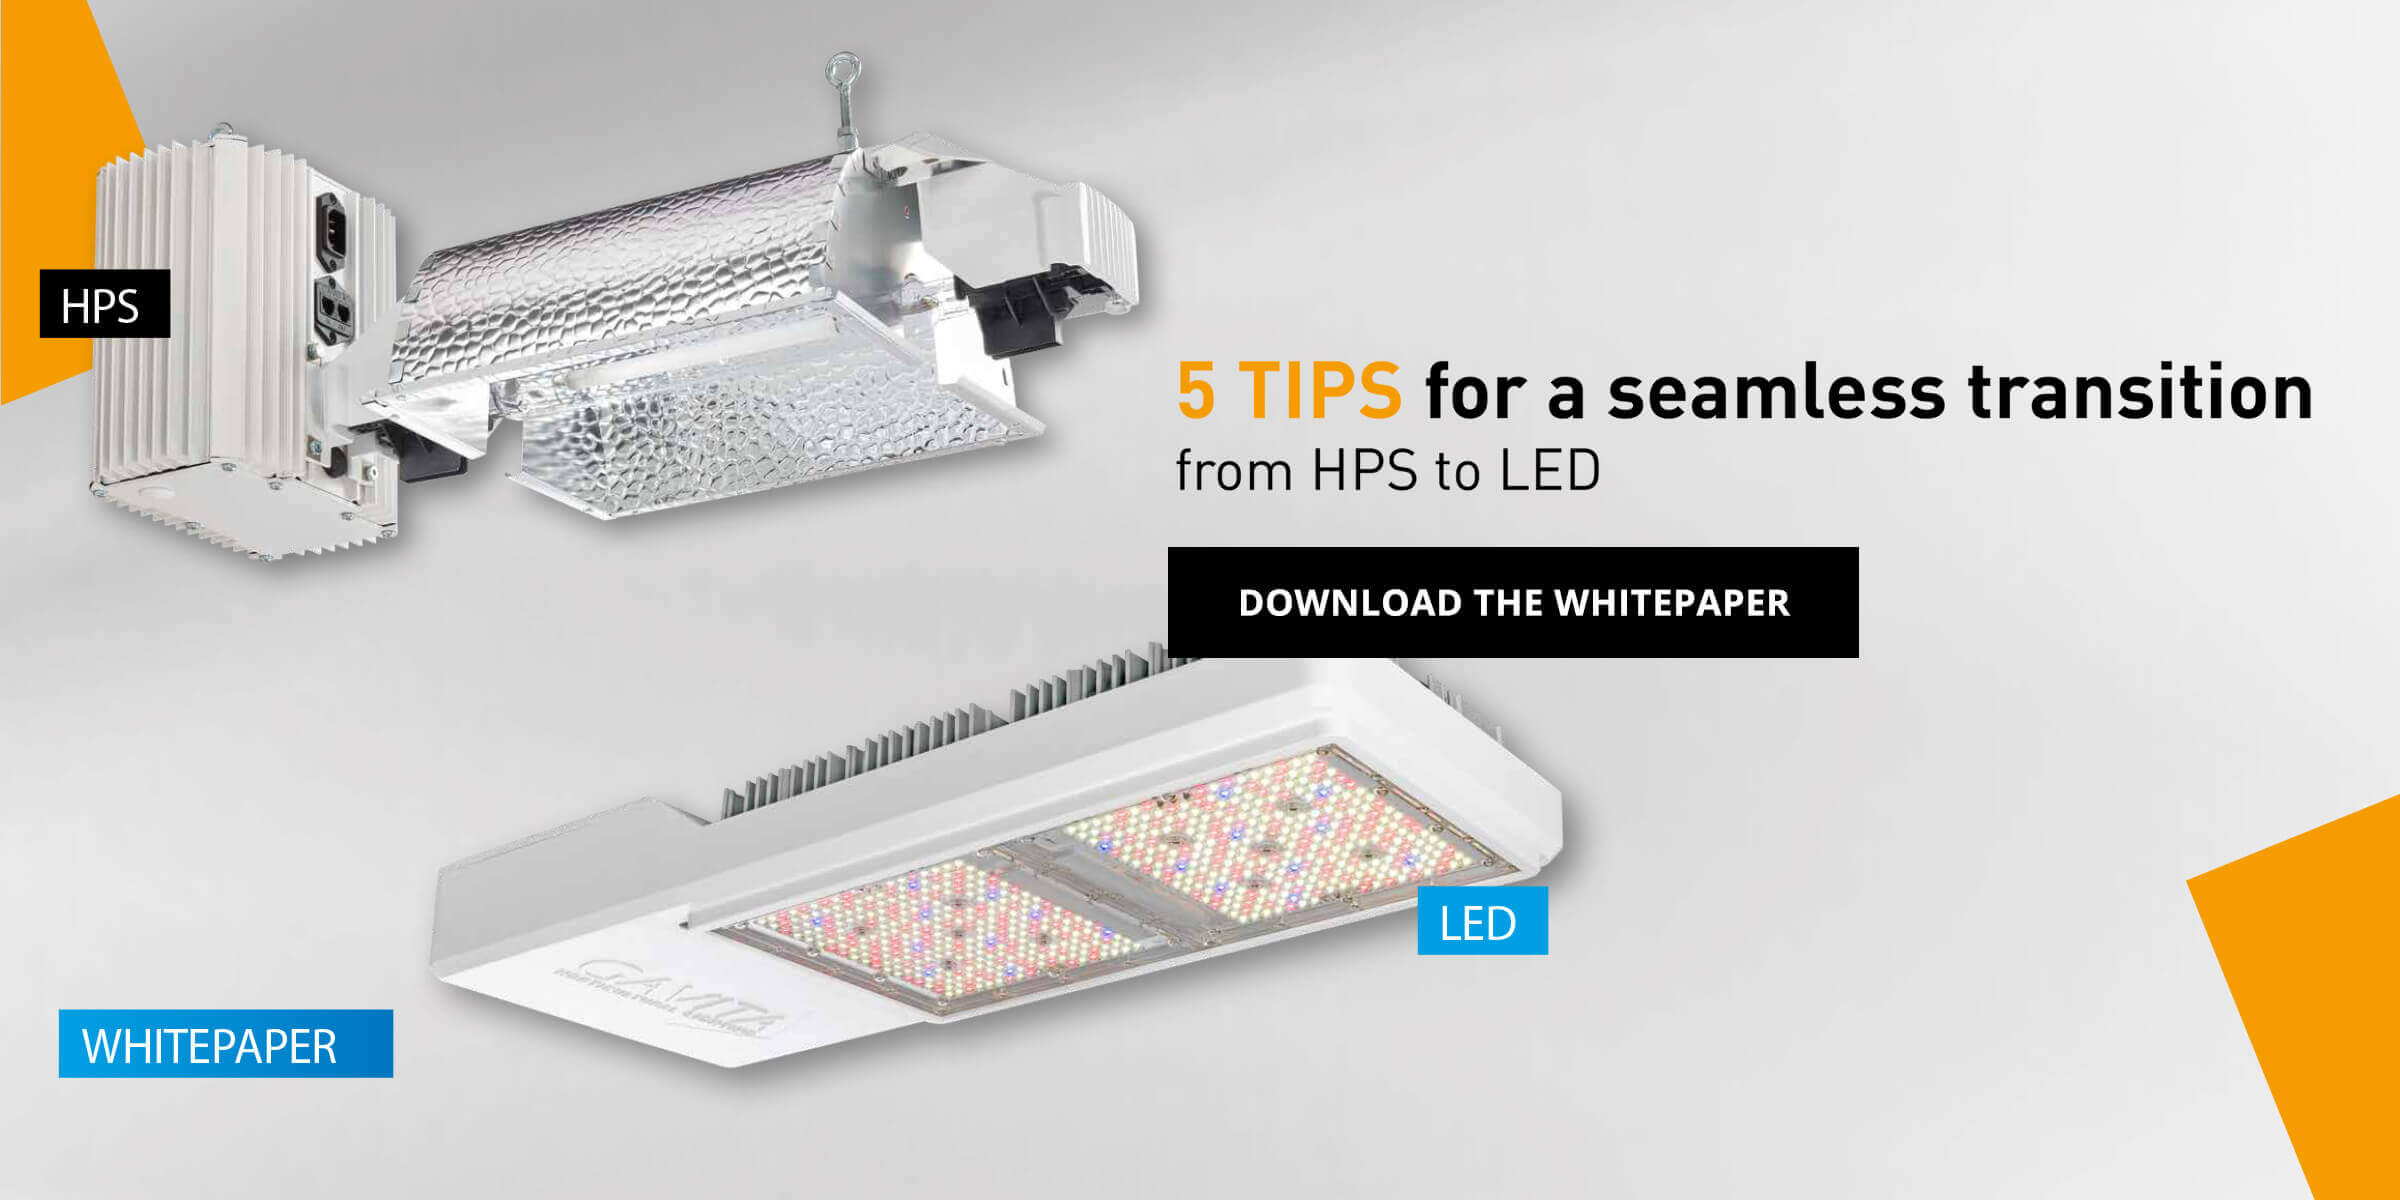
5 Tips for a Seamless Transition from HPS to LED
LED lighting is the future of indoor growing.
As pressure mounts for cultivators to embrace energy efficiency, more are making the switch from HPS to LED technology.
If you’re one of them, you may be wondering, how do you take full advantage of LED and make sure your grow is set up for success?
We’ve compiled the 5 most important things you can do when transitioning from HPS to LED.
- Adjust temperature when growing with led
- Use VPD as your management tool
- Factor in HVAC and dehumidification
- Consider the effects of light spectra and light intensity on crop growth
- Monitor and adjust nutrition and irrigation based on transpiration
1. Adjust temperature when growing with LED
Growers familiar with cultivating under HPS light know that their fixtures emit a significant amount of radiant heat—the sort of heat that warms up the upper foliage of your crops.
Excess radiant heat can damage your crop. But, when using HPS lighting at the manufacturer’s recommended mounting height and intensity, radiant heat can be also beneficial.
This is because the photosynthetic machinery your crops use to convert light to chemical energy and sugars function best within a certain temperature range. Too hot or too cold and the photosynthesis slows to a trickle. Further, warming the crops’ foliage promotes transpiration, or the movement of water and dissolved nutrients from the roots to new growth points. Taken together, photosynthesis and transpiration drive primary plant metabolism and growth.
LED fixtures produce significantly less radiant heat compared to HPS fixtures. Cultivators must compensate for this difference.
We recommend raising the ambient room temperature to make up for this loss in radiant heat. By raising the temperature, it’s possible to mimic the beneficial warming effect of HPS lighting.

Figure 1. HPS lighting emits significantly more radiant heat than LED lighting.
2. Use VPD as your management tool
In addition to monitoring and adjusting room temperature, it’s important to balance the other conditions, like moisture, in your space with a practice like VPD (vapor pressure deficit). Doing so can help promote maximum growth.
What is ‘Vapor Pressure Deficit Management’?
VPD is the difference (deficit) between the amount of actual moisture in the air and the amount of moisture the air can potentially hold when saturated. VPD is often measured in pounds per square inch (psi) or kilopascal (kPa).
When air is saturated with water, the VPD is 0 kPa. As VPD increases, the amount of water (or moisture) in the air decreases. A high VPD, considered greater than 1.0 kPa, indicates that the air can still hold a large amount of water.
VPD matters for two major reasons:
Disease:
Moisture, or the lack thereof, can contribute to plant disease. This is because once air becomes saturated, water will condense to form a film of water on leaf surfaces. This in turn, can drive disease-causing spores to germinate and infect the plant tissue. A film of water on a plant leaf makes it much more susceptible to rot.
Transpiration:
The gradient from the plant leaves (nearly saturated with water) and the air, drives transpiration. VPD more accurately expresses the driving force of water loss from a leaf. Unlike relative humidity, VPD has a simple, nearly straight-line relationship to the rate of evapotranspiration (water loss to the atmosphere by evaporation of water and transpiration from plants).
A VPD of zero means the air is 100% saturated and thus plants cannot transpire effectively. As VPD increases, transpiration increases accordingly.
This is why it’s recommended to keep VPD low for rooting cuttings or seed germination, and higher for finishing a crop and avoiding incidences of disease.
The goal is to maximize how long the stomata are open during the day in order to keep transpiration and photosynthesis at the max. This is accomplished by maintaining a favorable VPD during peak stages of plant growth and development.
Because VPD is a function of both temperature and humidity, when we raise our ambient room temperatures, we must raise our humidity levels as well to stay within a favorable VPD range. Raising temperatures without raising humidity will have the opposite effect on the plant by creating stress and reducing growth.
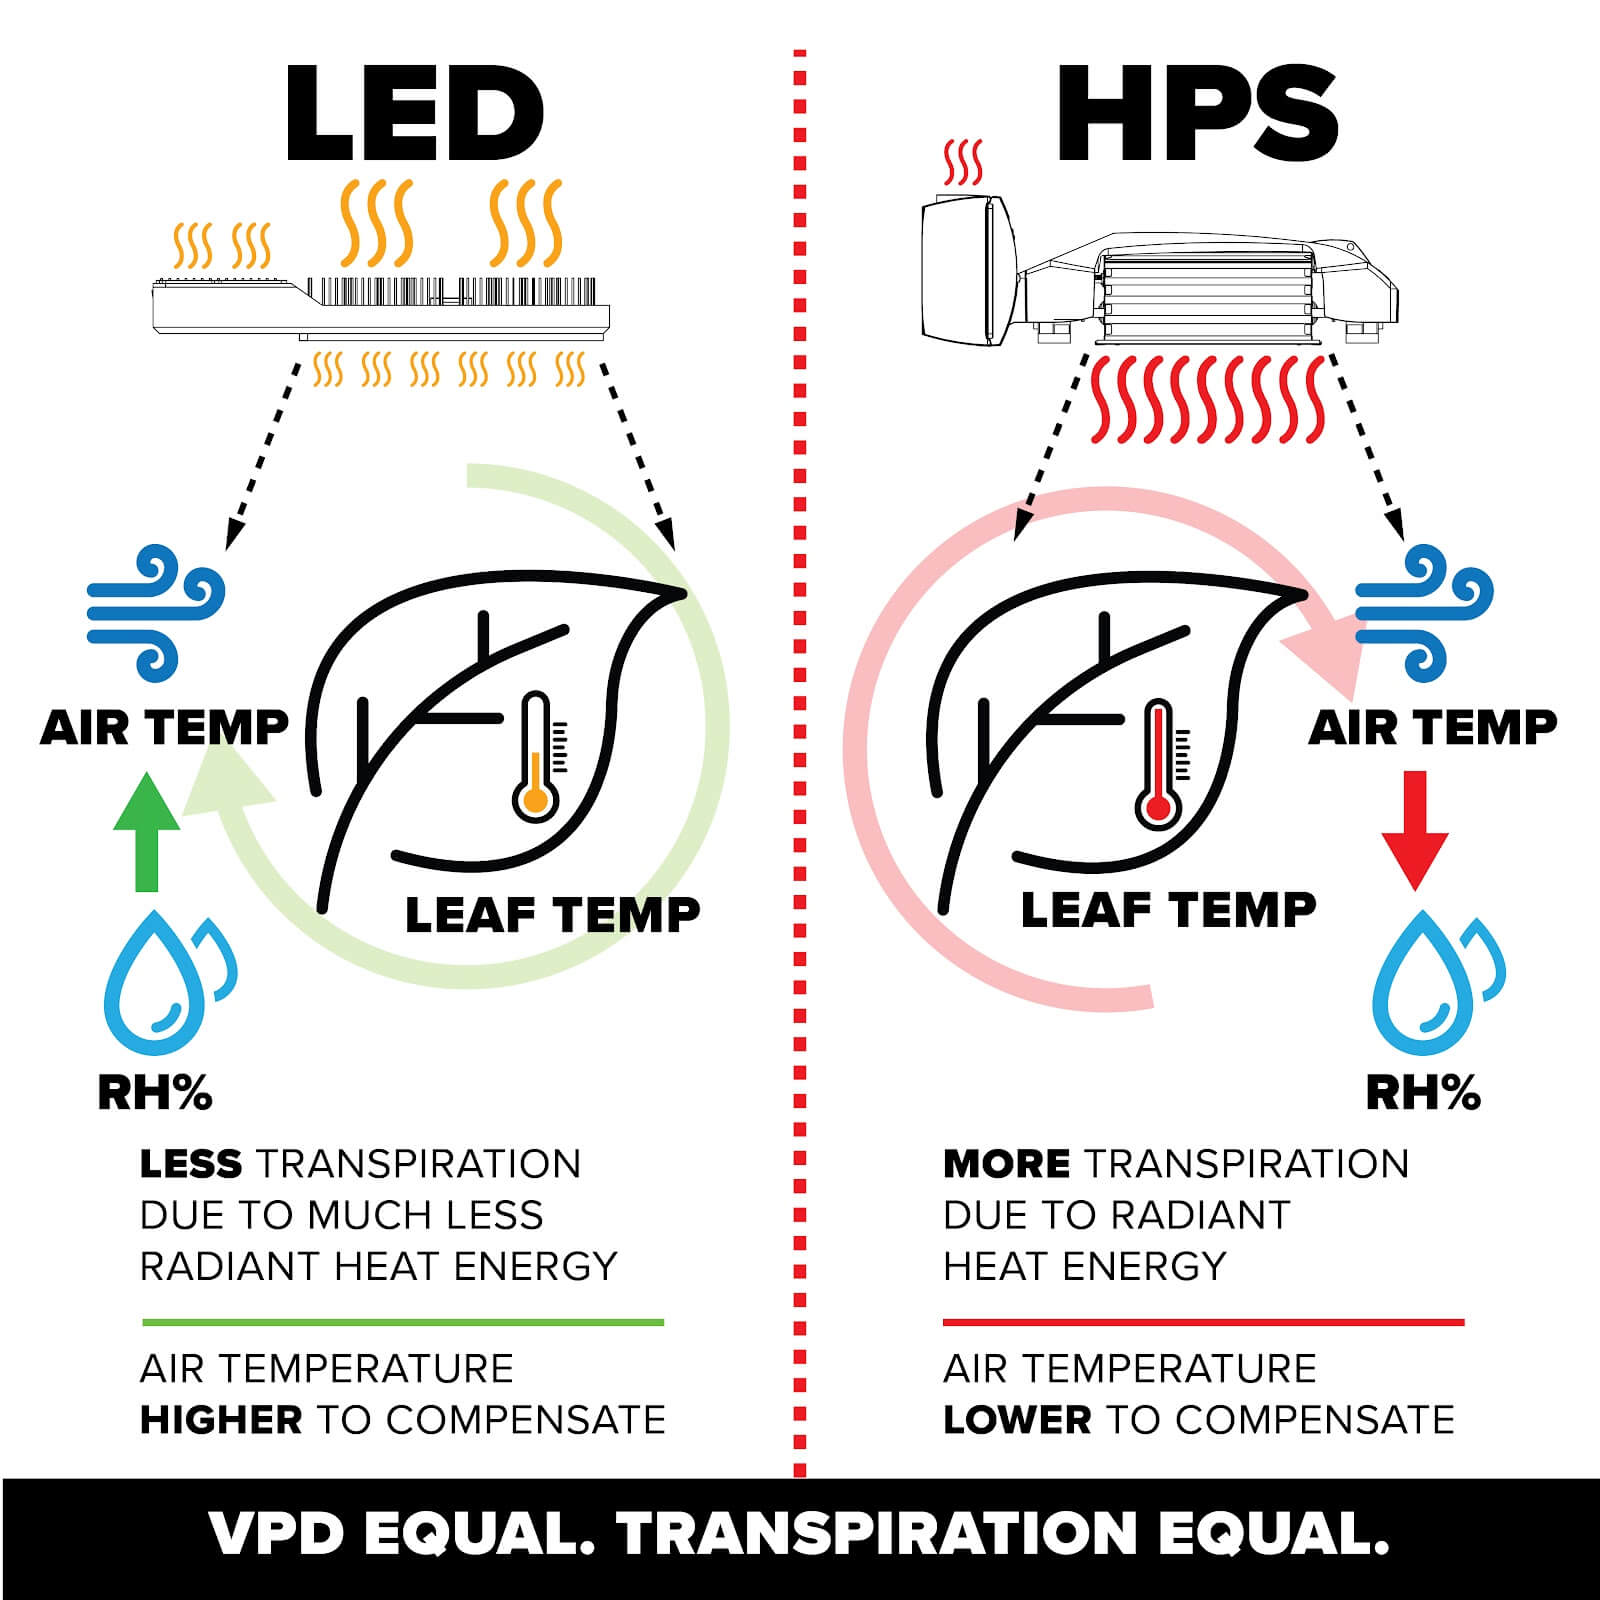
Figure 2. Gas exchange occurs at the stomata. Small pores on the underside of plant leaves exchange water and oxygen out, and CO2 in.
Disease mitigation tips and tricks
Table 1. Recommended VPD levels for various stages of plant growth
| Monitor temperature | Minimize fluctuations | Keep air moving |
| Most foliage diseases prefer cool, damp conditions to thrive. Keeping your ambient night temperature above 75° F is a good first step to keep diseases at bay. | Sudden drops in nighttime temperatures can cause humidity spikes (particularly immediately following lights off). Keep the day/night temperature differential ≤10° F, to help prevent condensation on your crops’ leaves, which can lead to disease. | Air movement is critical for a healthy grow space. Lack of uniform, steady air movement can cause stagnant, humid pockets in your grow space, promoting disease. Proper airflow will help keep microfilms of moisture off leaf surfaces (via evaporation). |
| Adjust per growth phase | Keep up with the canopy | Avoid overwatering |
| For flowering crops, which are sensitive to bud rot, we recommend lowering RH (raising VPD) levels once flowers start to fill out and become dense. | Defoliation or other canopy management methods can, and should, be employed to promote air movement deep into your crops’ foliage, further alleviating dead spots of ambient air. | Don’t keep pots saturated overnight. Ceasing irrigation events prior to lights off, and allowing for increased drybacks during the night, can be effective at mitigating large humidity spikes at night. |
Keep in mind: There is a balance between disease prevention and optimum plant growth and development. It’s important to understand your facilities’ limitations and make adjustments accordingly.
3. Factor in HVAC and dehumidification
When switching from HPS to LED, an important consideration is dehumidification.
LEDs are usually more efficient than HPS at converting electrical energy into light energy. Typically, this means growers can save on their energy bills and their rooms will require less cooling to maintain optimum growing conditions and high light levels.
This can also mean that your existing HVAC may not be controlling humidity like before. After all, if your HVAC system isn’t working as hard to cool the room, it may not be removing as much water vapor, either.
In these cases, it’s a good idea to consider installing additional dedicated dehumidification equipment. Consider that 90% of the volume of your irrigation solution is being released from your crops’ leaves, the surface of your growing substrate and any leached water as water vapor. Collectively, these are known as “evapotranspiration.”
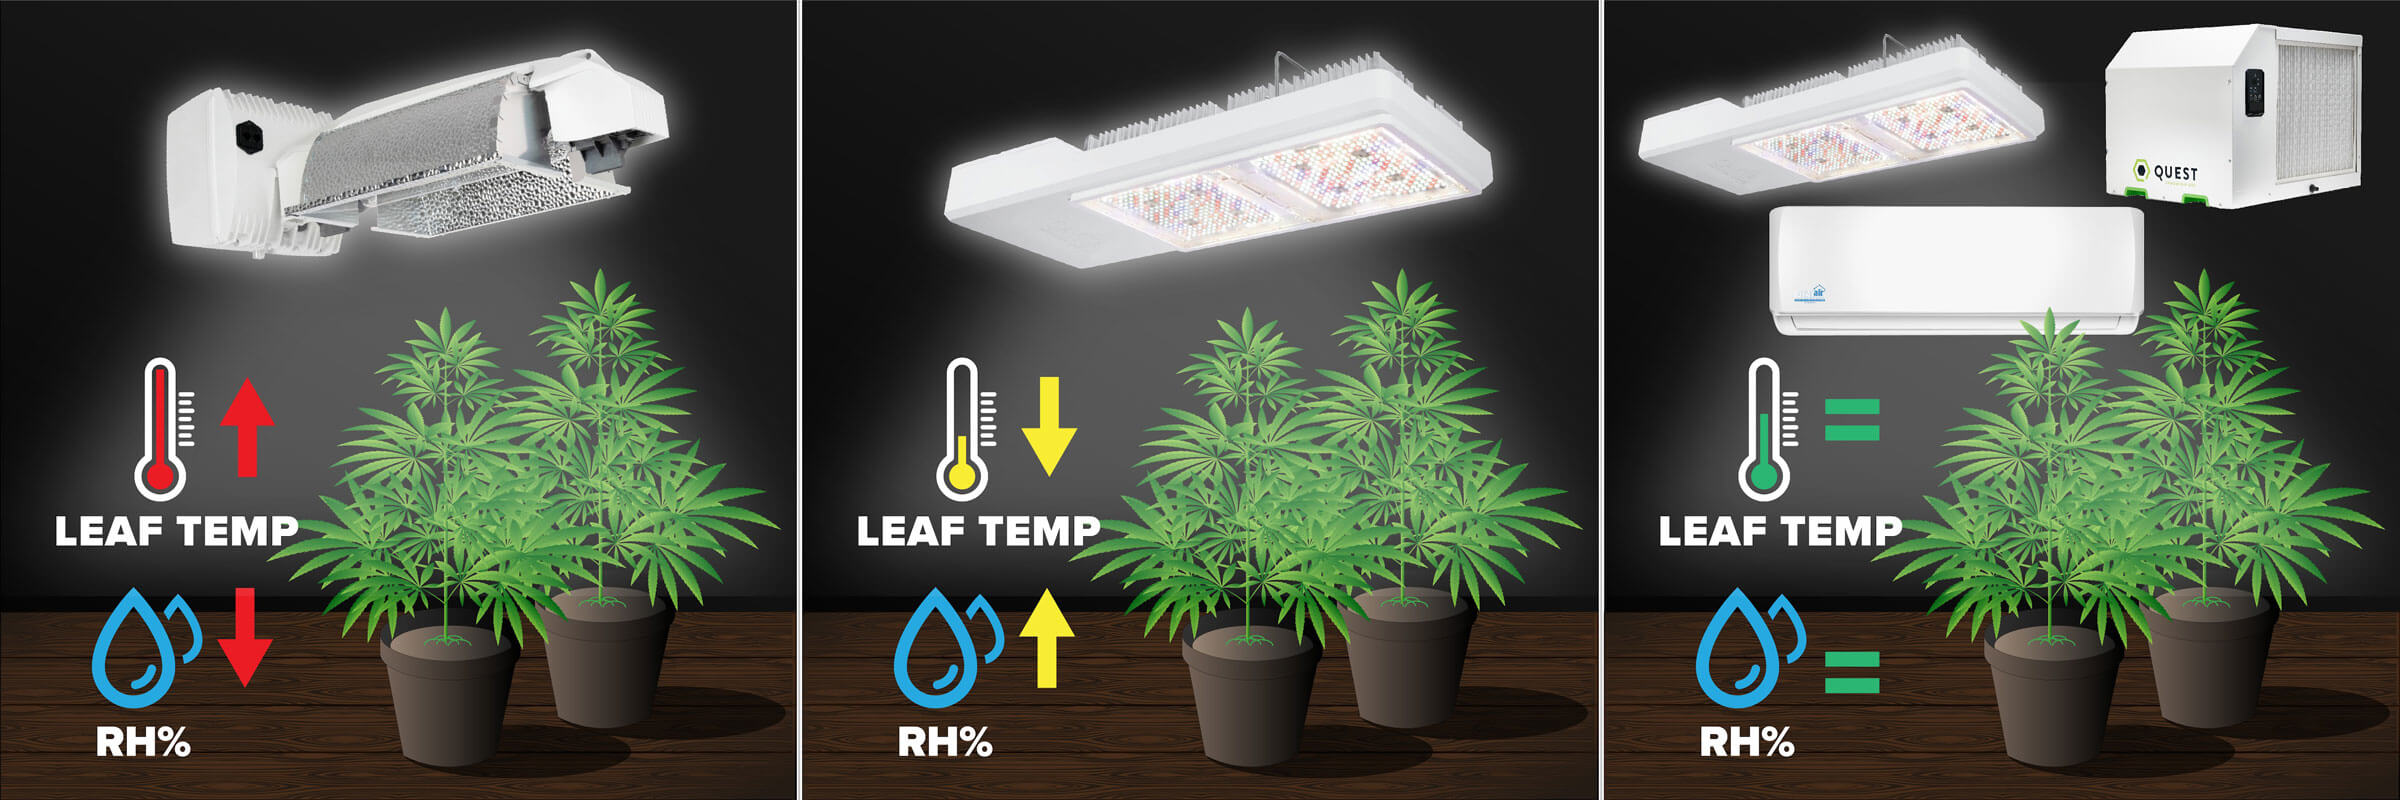
Figure 3. Infographic showing HVAC heat + moisture removal vs sole source DEHU* (something more technical and applied to crops than above!).
4. Consider the effects of Light Spectra and Light Intensity on crop growth
Aim for a Balanced Light Spectra
The effect various light wavelengths have on the structure and shape of a plant is called photomorphogenesis.
And it’s about more than just red and blue light. UV light, far red light and even green and orange light affect plant growth!
HPS Spectra:
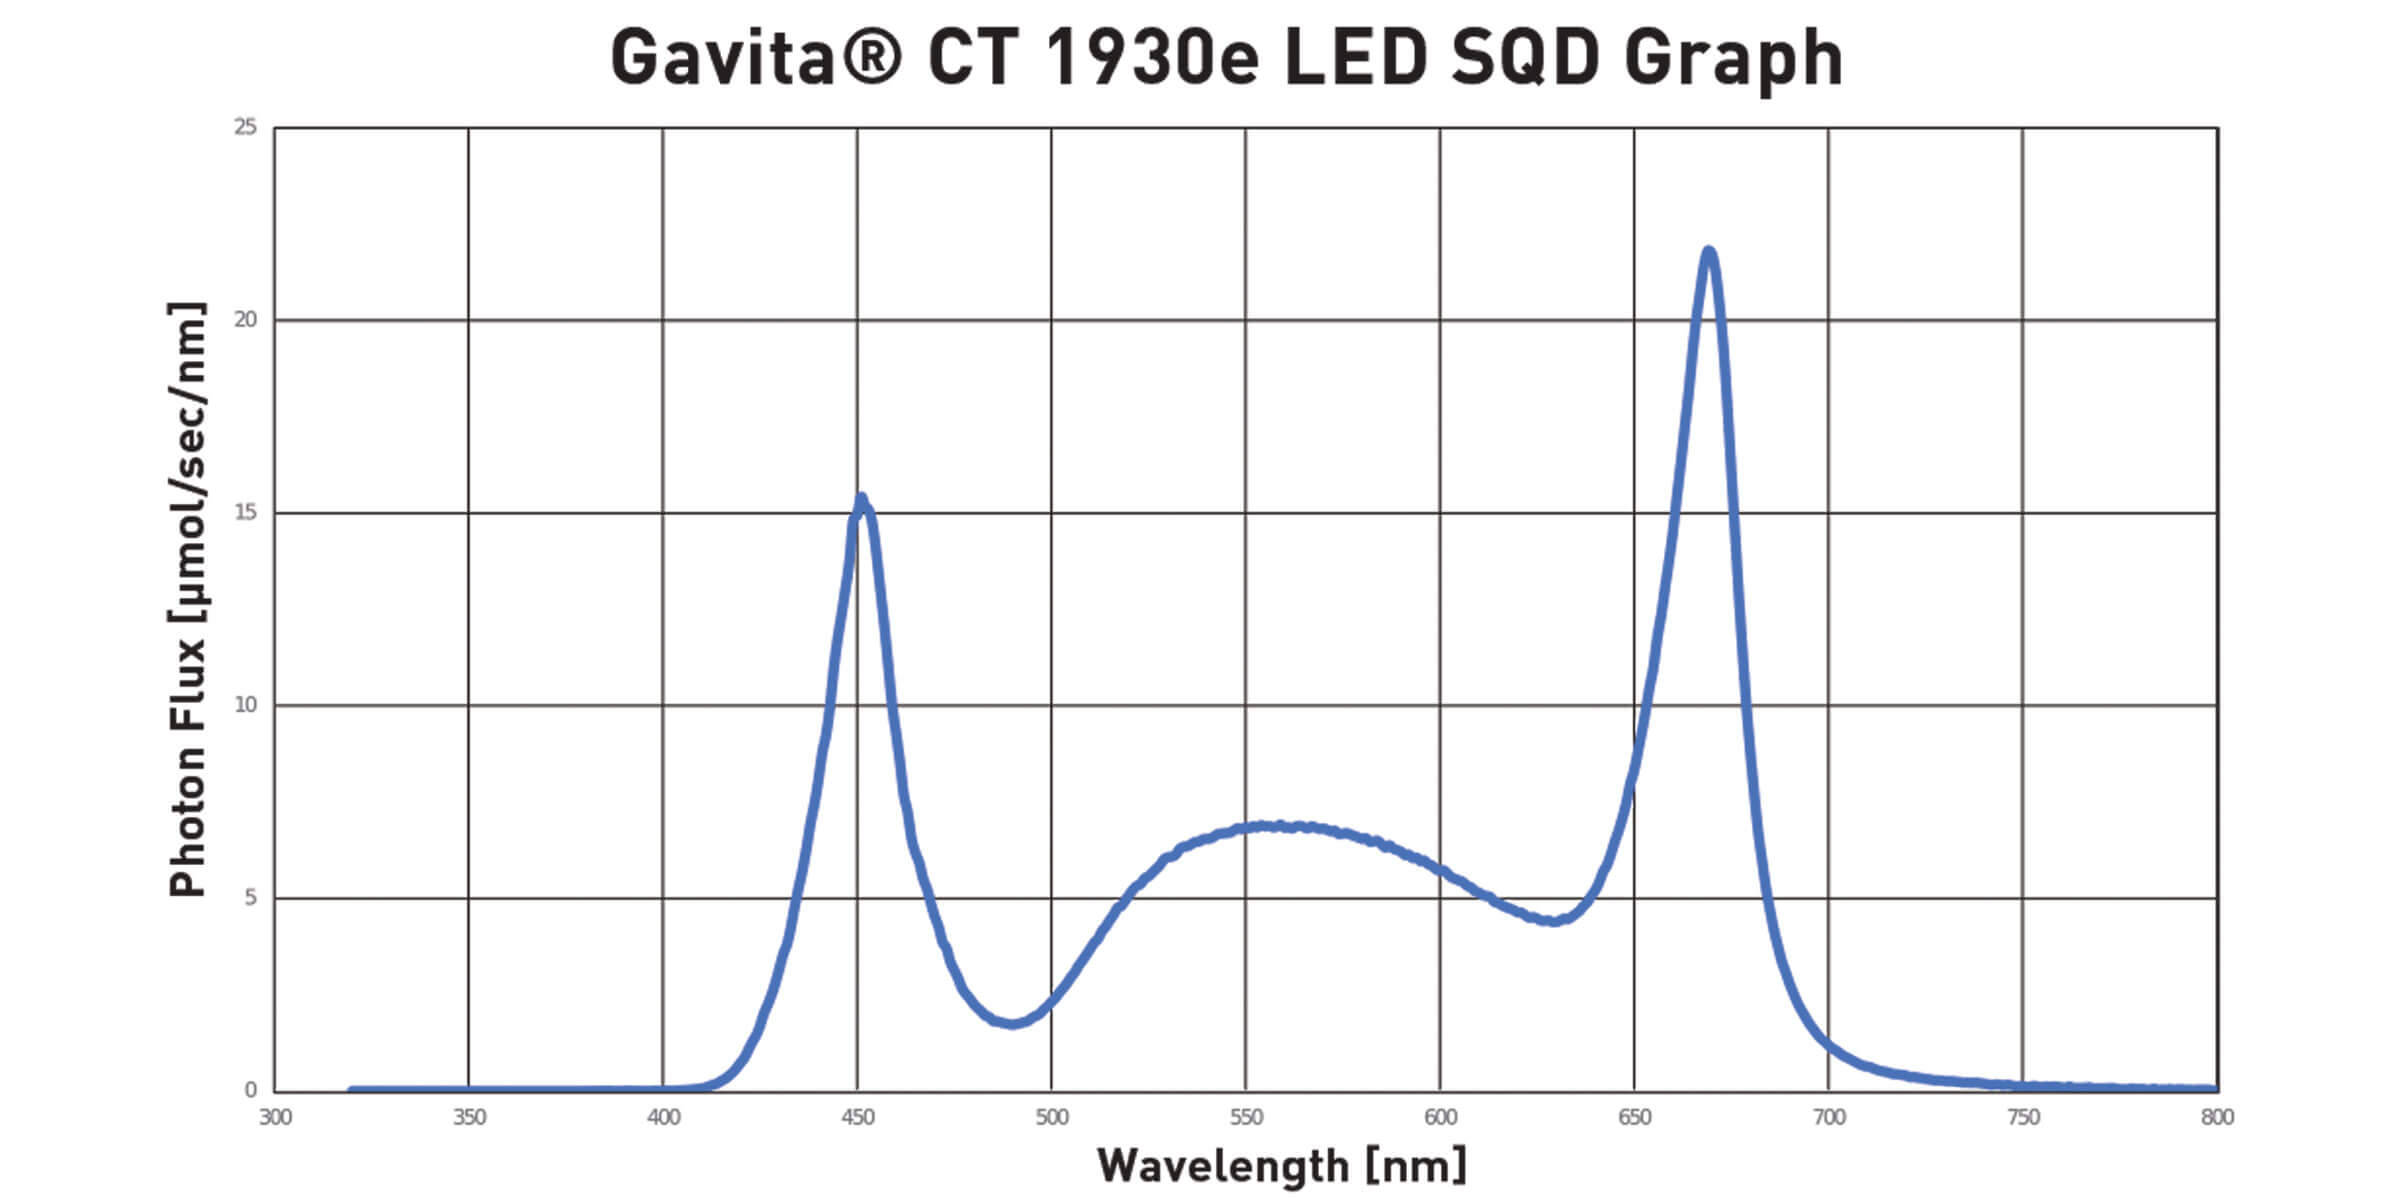
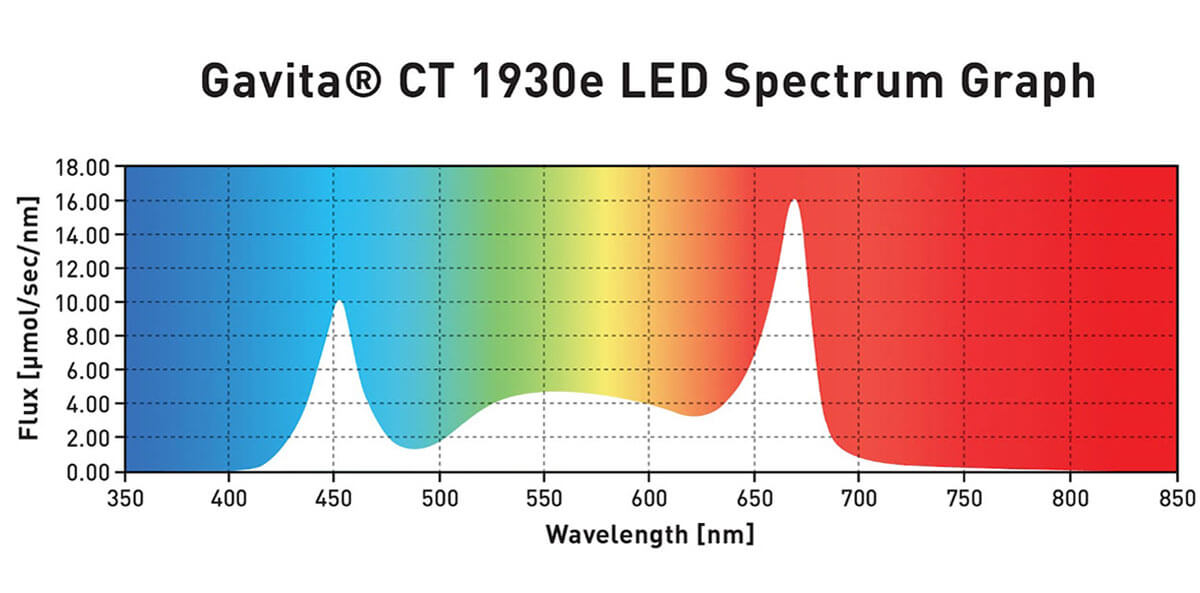
HPS lighting emits a lighting spectrum dominant in far red, red and yellow wavelengths of light. A red-dominant spectrum like this can cause plants to grow taller and develop thinner stems and leaves as compared to natural sunlight. Natural light is thought to be more “balanced” due to more ultraviolet (UV), blue and green wavelengths.
LED Spectra:
Rich in blue, green, yellow and red light, LEDs can provide a more balanced lighting spectrum than HPS. Crops grown under the balanced spectrum of an LED exhibit growth patterns more true to crops grown under natural sunlight than those grown with HPS lighting. The result is crops that are stockier, with thick stems and expansive, broad leaves.
More than meets the eye:
The effect various light wavelengths have on the structure and shape of a plant is called photomorphogenesis. And it’s about more than just red and blue light. UV light, far red light and even green and orange light affect plant growth!
Differences in growth
This makes sense from an ecological perspective, as plants have evolved to respond to natural light. Plants growing out in the open (more blue light and red light, minimal far red light), develop a more compact, stocky habit.
On the other hand, plants grown under a plant canopy (low blue and red light and high far red light), such as in a forest, will stretch and be somewhat spindly, often said to be “seeking” light.
It’s helpful to keep these differences in mind when planning a transition from HPS to LED fixtures.
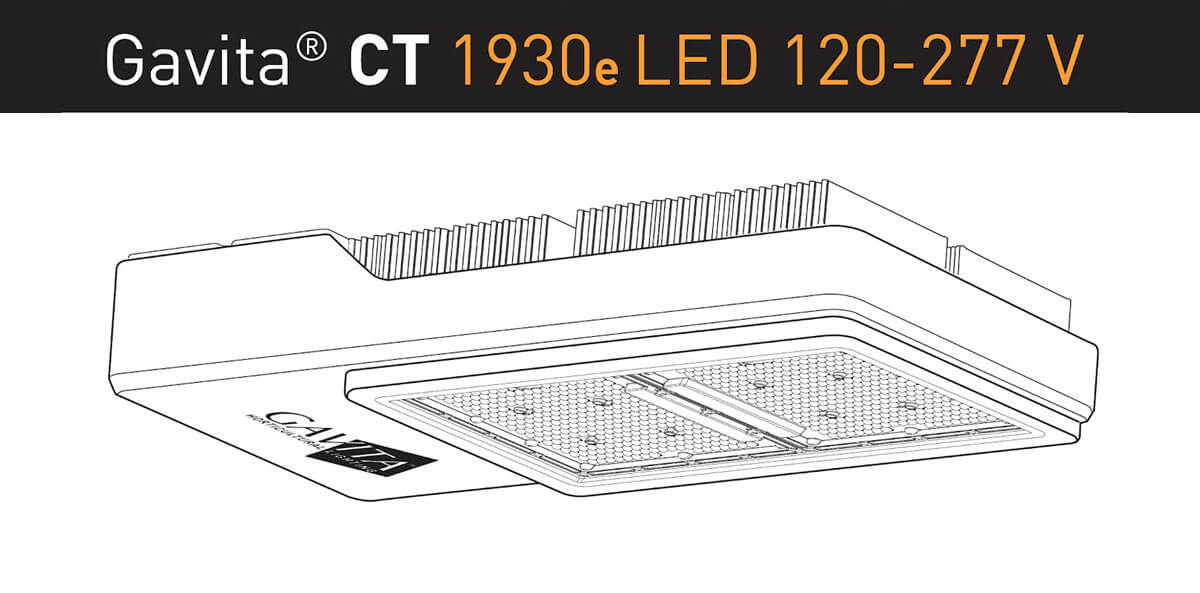
Figure 4. Image of Gervais 1930e vs DE HPS trial crops for reference.
Take advantage of increased light intensity
Remember how HPS fixtures emit significant amounts of radiant heat? That heat prevents growers from placing their crops too close to HPS fixtures, which generally limits the maximum light intensity a plant will receive, compared to LED fixtures. Because LEDs emit less radiant heat than HPS, cultivators can increase the PPFD (photosynthetically active photon flux density, or the amount of plant-usable light, measured in photons) to higher levels than recommended when using HPS.
This is a game-changer for growers. It means cultivators can now help deliver more photons on-target without overheating their crops, helping push maximum growth like never before.
A few things to keep in mind when using LED
- Dialing in your environment (temperature, humidity, CO2, watering and nutrients) is critical to helping your crops make use of the extra photons.
- More is not always better. If crops cannot effectively make use of the extra photons, increased light energy can cause oxidative damage to the photosynthetic machinery of your crops, leading to photoinhibition, or a reduction in the photosynthetic capacity of a plant in response to excess light energy.
- Optimize your growing parameters for growing with LED. This can help avoid metabolic bottlenecks that lead to photoinhibition, helping promote rapid, balanced growth.
- Monitor light intensity. Because LEDs are often mounted much closer to plant canopies than HPS, we recommend using a PAR (photosynthetically active radiation) meter to measure PPFD at the canopy and help minimize overexposure.
Remember to check your PPFD levels with your PAR meter before moving in your young plants!
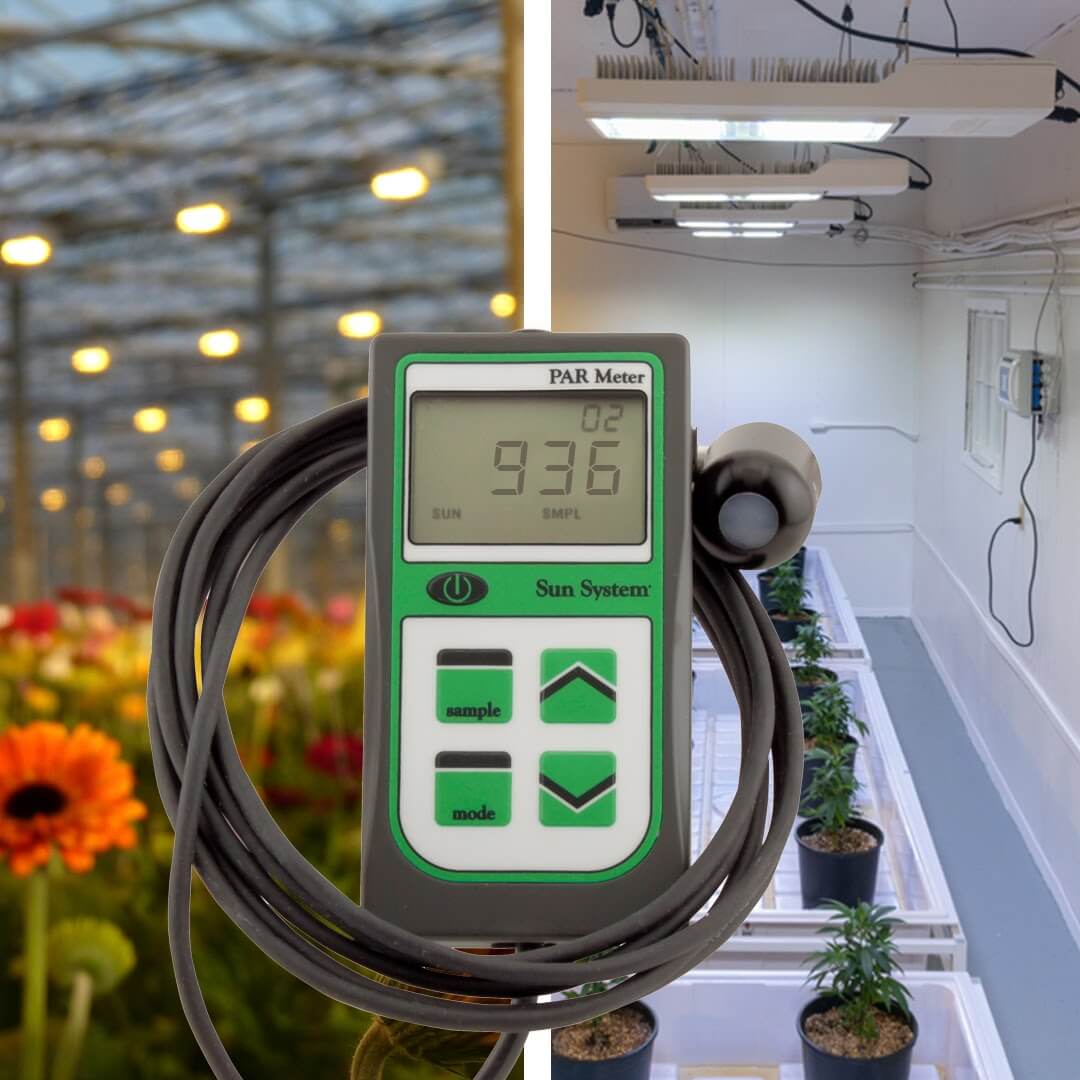
Figure 5. Sun System PAR meter for accurate PPFD measurements
5. Monitor and adjust nutrition and irrigation based on transpiration
It’s a common misconception that switching from HPS to LED automatically triggers a need for increased nutrient and irrigation events.
It’s true, under ideal conditions, higher PPFD levels (as are possible with LED light) generally lead to faster growth, and thus an increased need for nutrients and water.
But more often, nutrient needs increase because growers do not adjust the other room parameters, like ambient temperature, VPD and dehumidification (as outlined in steps 1-4)—not strictly because of higher PPFD levels.
Let’s break it down…
Effects of Transpiration on Irrigation and Nutrient Needs
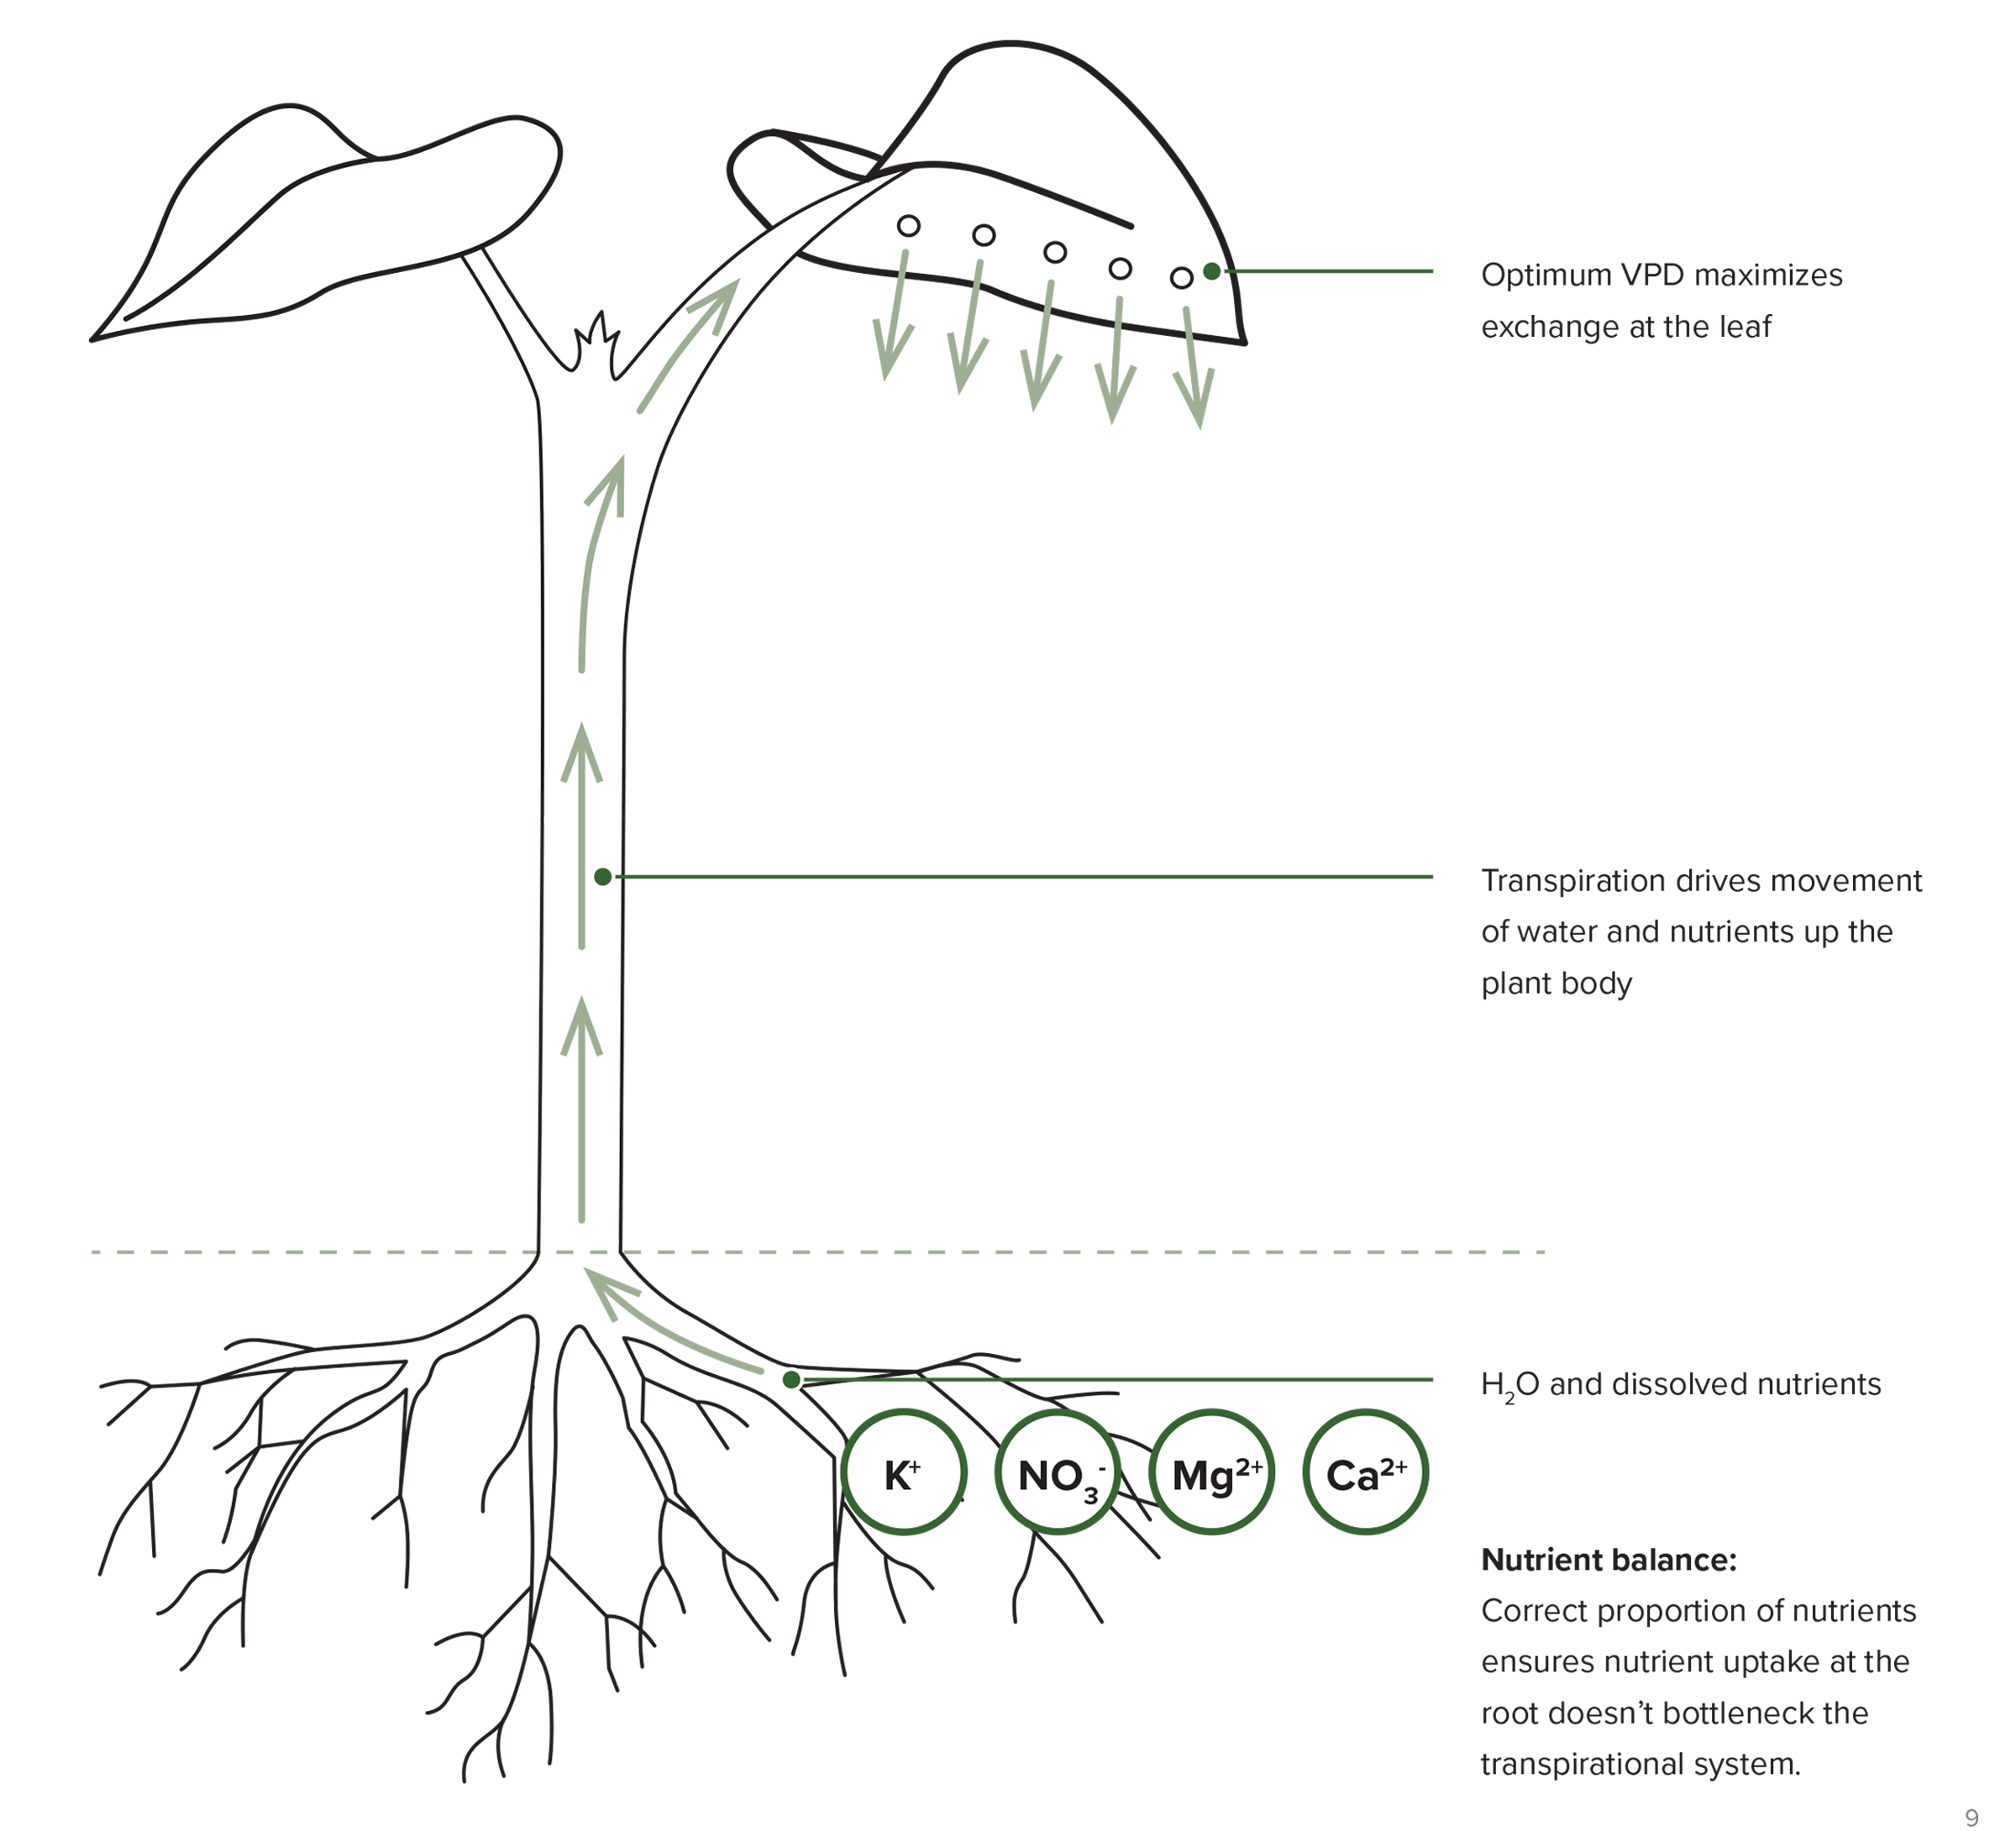
Water is the delivery vehicle, and dissolved nutrients are the cargo. This means that the higher the rate of transpiration, the more efficiently the crop is able to shuttle essential nutrients to new growth points and generally speaking, the lower the concentration (i.e. ppm of nutrients, mL per gallon of fertilizer, etc.) of nutrients required for healthy, balanced growth.

HPS
- Can provide beneficial warming from radiant heat
- All else being equal, often leads to higher transpiration rates
- Existing nutrient levels
LED
- Generally provide less radiant heat than HPS fixtures
- If room parameters are not changed, can potentially lead to slower rates of transpiration
- Increased nutrients are advisable for continued growth
- Don’t keep pots saturated overnight. Ceasing irrigation events prior to lights off, and allowing for increased drybacks
during the night, can be effective at mitigating large humidity spikes at night.
If we compensate for the lack of radiant LED heat by adjusting ambient temperature, VPD and other conditions, we can help optimize transpiration. In turn, nutrient needs generally will not increase. In fact, at times they may even decrease. Think in terms of the TOTAL amount of nutrients (concentration x volume) delivered per day, or per growth stage.
So how do you know if your crops are transpiring at a higher, lower or equal rate from HPS toLED? It can be fairly straightforward if you know what to look for.
How to Estimate Transpiration Levels
Measure the total volume of irrigation solution required each day to maintain the same moisture content in your substrate for crops under LED vs. HPS fixtures.
Then, determine the following:
- If HPS water usage > LED water usage, we can reasonably infer that the crops are transpiring less, thus nutrient concentration should be increased.
- If HPS water usage < LED water usage, we can reasonably infer that the crops are transpiring more, thus nutrient concentration can remain the same or even be reduced.
Nutrient dropoff
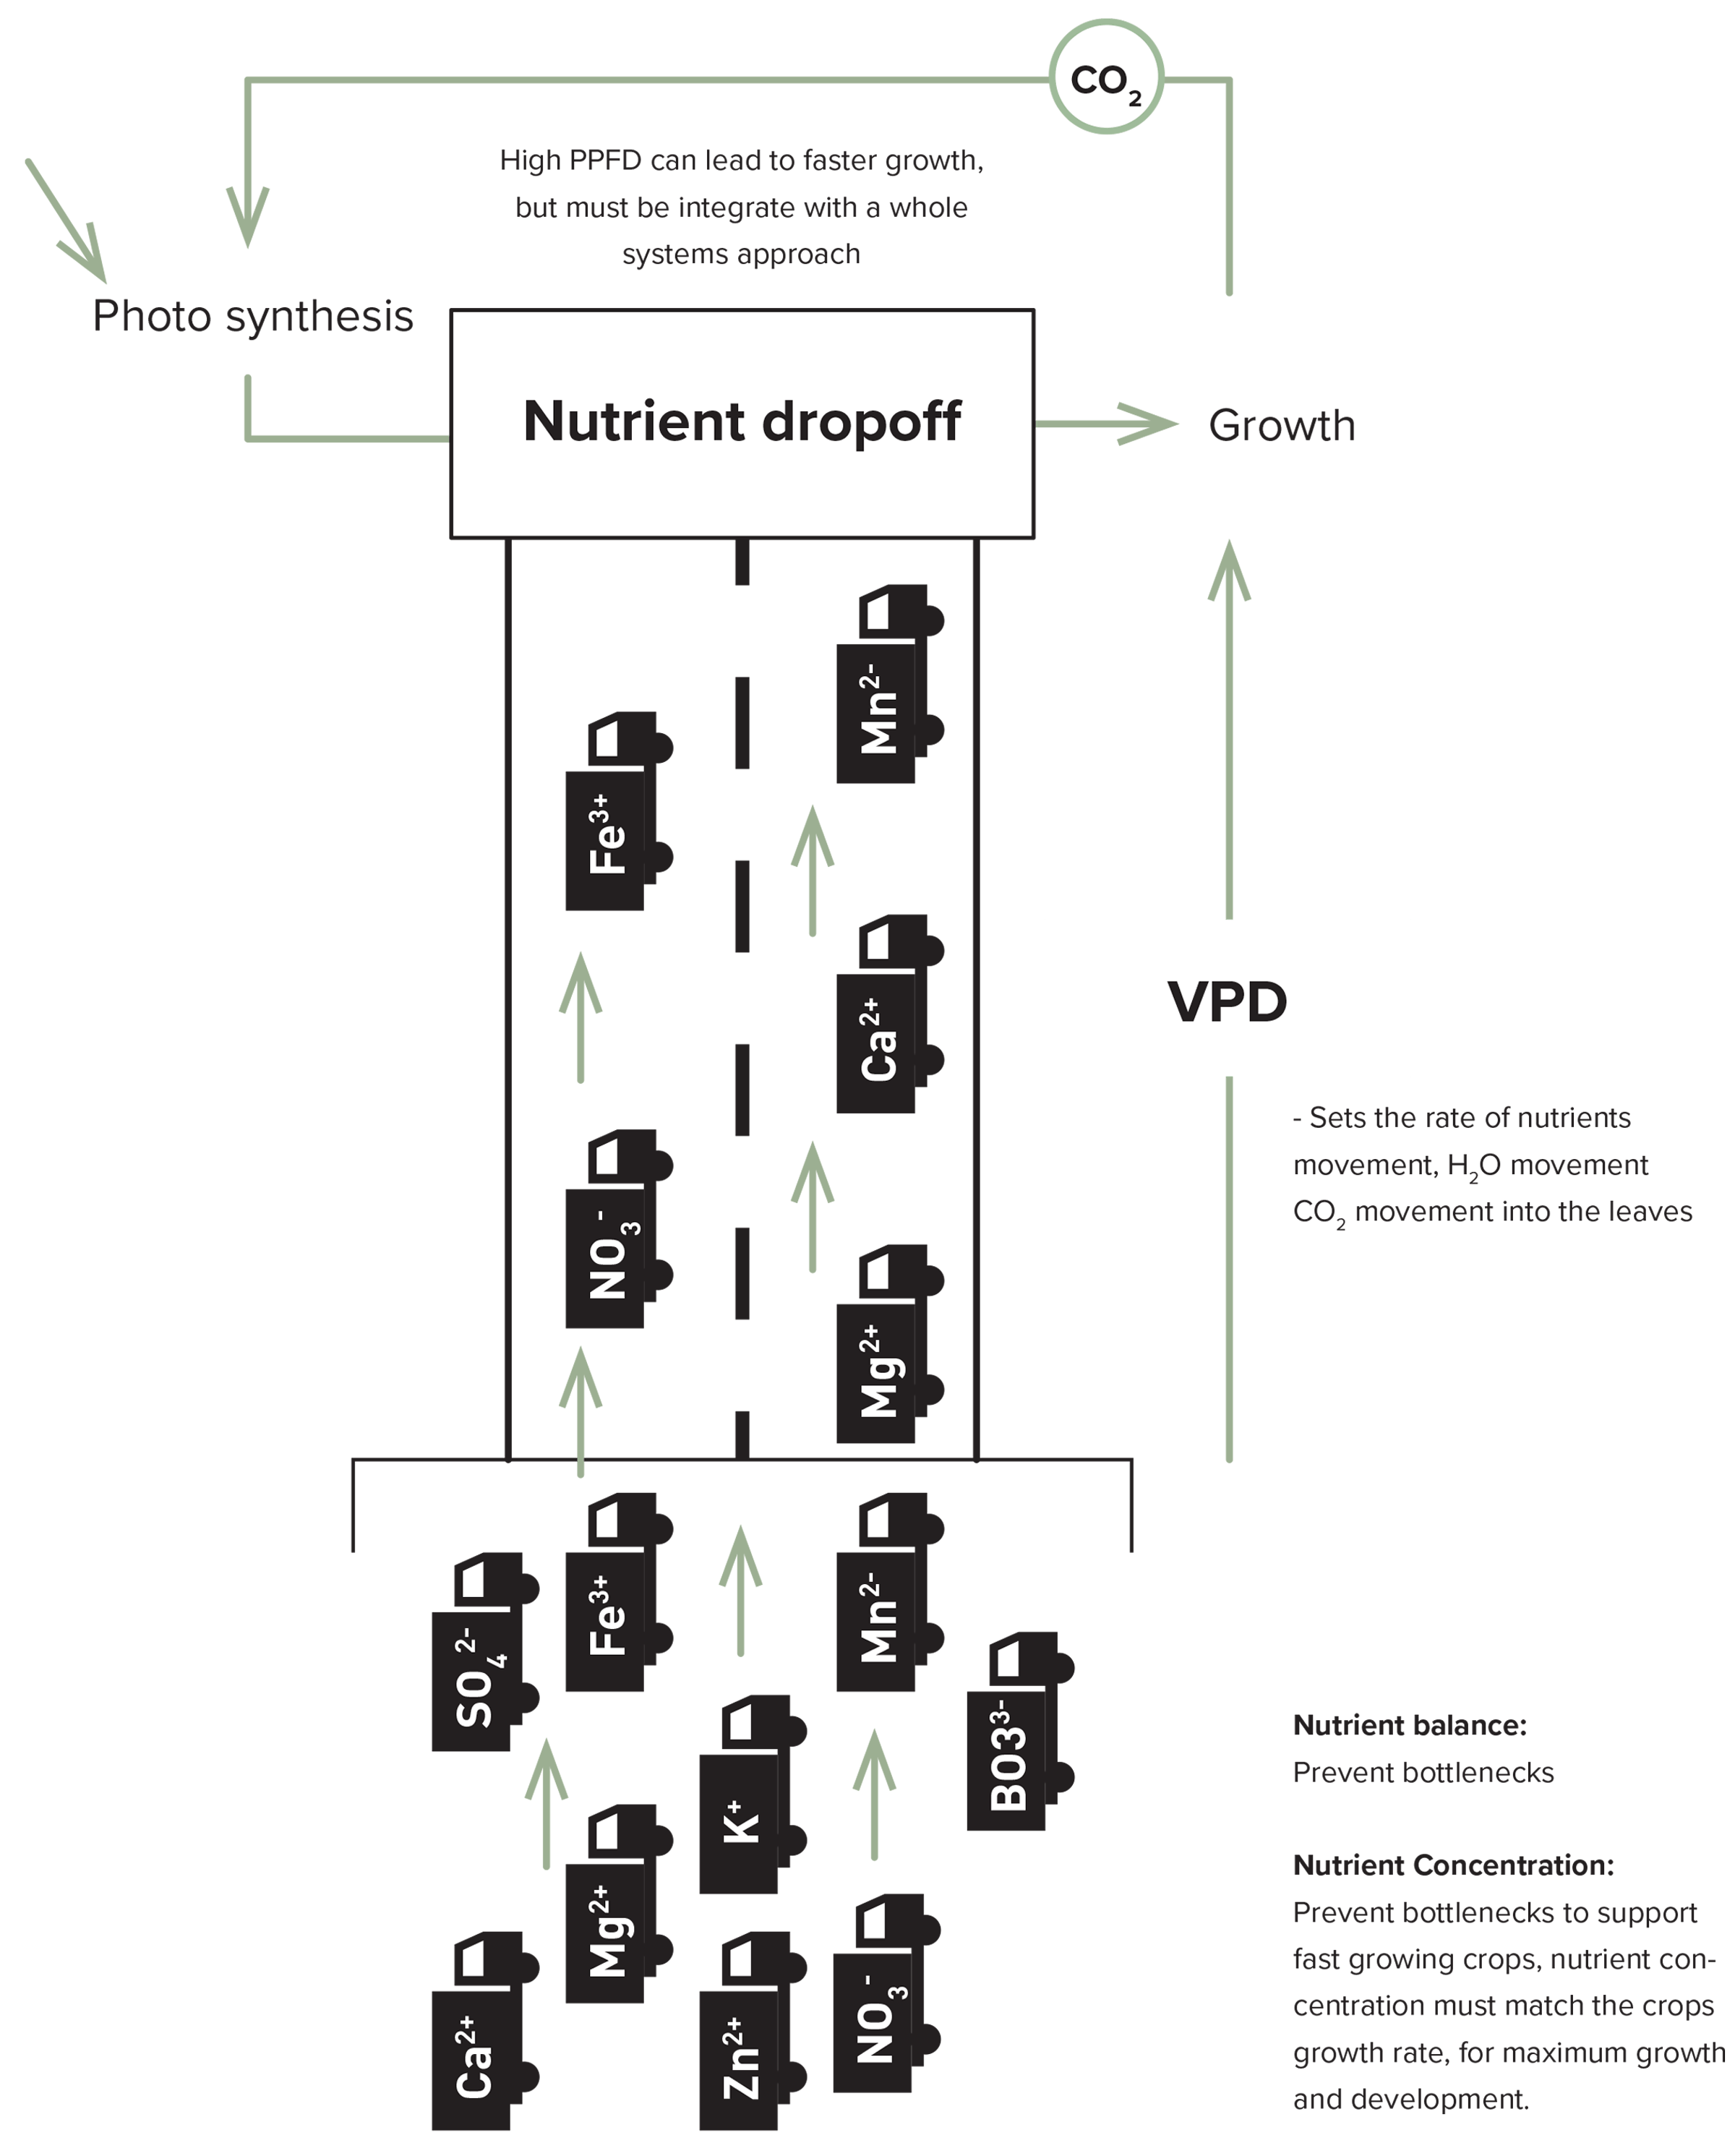
Table 2: LED Cultivation Setpoints
Lighting setpoints are recommendations only and actual settings will vary depending upon environmental conditions and the need of an individual crop.
| Mothers | Propagation Week 1 | Propagation Week 2 | Propagation Week 3 | Veg Week 1-2 | Veg Week 2-4 | Flower Week 1 | Flower Week 2 | Flower Week 3-5 | Flower Week 6 | Flower Week 7 | Flower Week 8 | Flower Week 9 | |
|---|---|---|---|---|---|---|---|---|---|---|---|---|---|
| Lighting Spectrum | Broad Spectrum | Broad Spectrum | Broad Spectrum | Broad Spectrum | Broad Spectrum | Broad Spectrum | Broad Spectrum | Broad Spectrum | Broad Spectrum | Broad Spectrum | Broad Spectrum | Broad Spectrum | Broad Spectrum |
| Photoperiod (hours) | 18 | 18 | 18 | 18 | 18 | 18 | 12 | 12 | 12 | 12 | 12 | 12 | 12 |
| Lighting Intensity (µmols/m2/s) | 500 | 150 | 250 | 250 | 400 | 550 | 650 | 800 | 1000 -150 0* | 1000 -120 0* | 800- 1000 * | 800 | 700 |
| CO2 ppm, Day | 800 | 400 | 600 | 600 | 800 | 800 | 1000 | 1200 | 1200 | 1200 | 800 | 600 | 400 |
| CO2 ppm, Night | 400 | 400 | 400 | 400 | 400 | 400 | 400 | 400 | 400 | 400 | 400 | 400 | 400 |
| Day Temp | 85 | 75 | 75 | 75 | 85 | 85 | 85 | 85 | 83 | 80 | 78 | 75 | 72 |
| Night Temp | 75 | 75 | 75 | 75 | 75 | 75 | 75 | 75 | 75 | 72 | 72 | 68 | 65 |
| Day RH | 75 | 80 | 80 | 70 | 75 | 75 | 75 | 75 | 70 | 65 | 60 | 55 | 50 |
| Night RH | 65 | 80 | 80 | 70 | 75 | 75 | 75 | 75 | 75 | 55 | 50 | 45 | 45 |
| Leaching Fraction | 5%-20% | n/a | n/a | n/a | 5%-20% | 5%-20% | 5%-20% | 5%-20% | 5%-20% | 5%-20% | 5%-20% | 5%-20% | 20%+ |
| *PPFD @ Flower Weeks 3-5 | PPFD @ Flower Week 6 | PPFD @ Flower Week 7 | Crop Index |
| 1000 | 1000 | 800 | All strains |
| 1000-1200 | 1200 | 1000 | Most strains |
| 1200-1500 | x | x | Test first, strain dependent |
